Friday, September 30, 2011

Fall Salad w/ Apple Vinaigrette


So, I got a request.  My friend, Katie, wanted a warm apple vinaigrette.  So, here I am!  Enjoy, Katie, and whomever else may try this.  I ate this thing UP!  Yummy.  This is meant to be a warm dressing.  If you need to make ahead, or you just want it warmer after making it, pop it in the microwave for 30 seconds and stir well.

Chop one small shallot or a purple onion.  You need a TBSP.

Start by toasting the almonds in a dry, small non-stick skillet on medium heat.  Watch these closely!  Once they get going, they can burn easily.  Pine nuts would work really well, here, too.  Once you smell the nuts getting "nutty," put aside.  Add 2 thick cut slices of bacon to the same skillet.  I went ahead and cut it into lardons and then cooked it.  Take the bacon out and set aside.  Leave the bacon grease in the pan.  Take the skillet off the heat and add your finely diced shallot and grate a half an apple into the bacon grease.  Use the smallest grate you can...you want a pulp here.  When you grate, the apple peel should just stay out of it.  You'll be left with the peel when all is said and done.  Do not grate the core.  Add a pinch of kosher salt and pepper, two TBSP. apple cider and 1 TBSP. brown sugar and return to heat.  Cook until the shallot is soft and the apple cider is reduced.  Should look like this:


Add 1 TBSP. dijon mustard and 2 TBSP. apple cider vinegar.  Whisk together until thick and add 1 tsp. parsley.


Use greens of your choice and add thinly sliced purple onion.  Go ahead and drizzle the dressing over the salad.  This dressing is for at least 2 salads.  Don't overdress your salad here.


Top salad with dried cranberries, crumbled goat cheese, your bacon lardons, thinly sliced apple slices, and your toasted almonds.

Enjoy!!!!!!!


Recipe Card

1 TBSP. finely diced shallot or purple onion
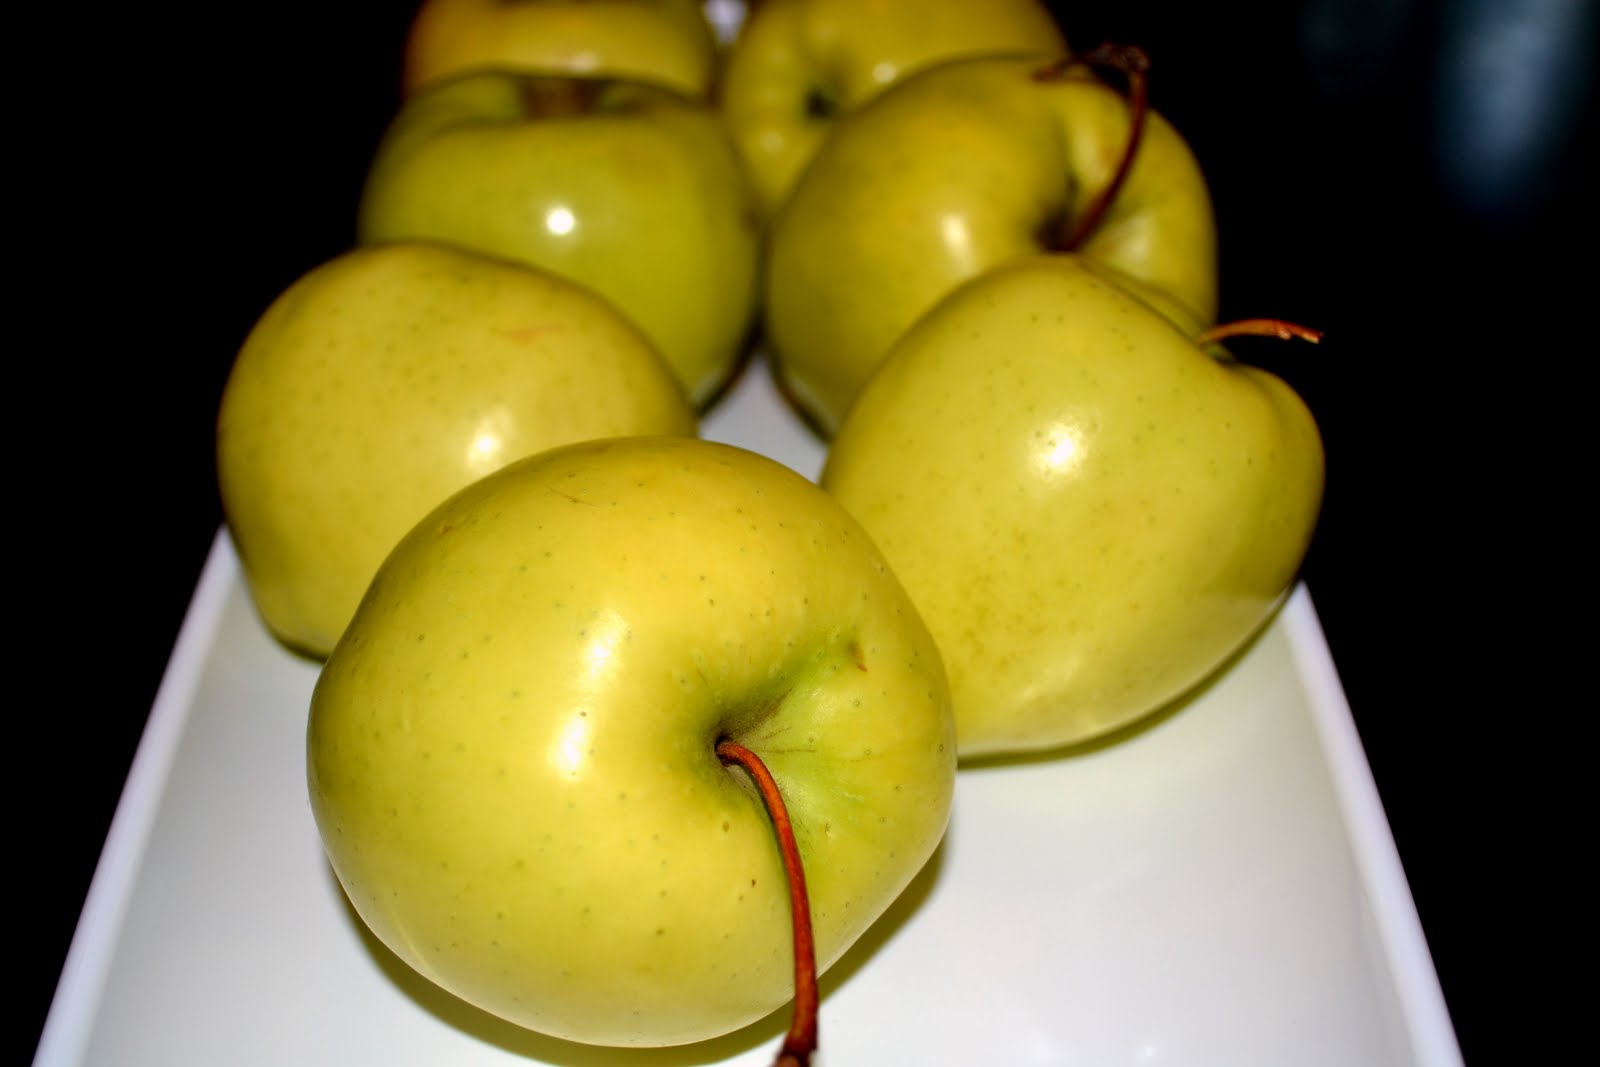
1 red apple
3 TBSP. sliced almonds or pine nuts
2 thick cut bacon slices (3-4 if traditional cut) cooked bacon set aside, grease for dressing
1 TBSP. brown sugar
2 TBSP. apple cider
1 TBSP. dijon mustard
2 TBSP. apple cider vinegar
salt and pepper
1 TBSP. parsley

Salad Greens
thinly sliced purple onion, to your liking
dried cranberries, to your liking
crumbled regular goat cheese


Monday, September 26, 2011

Eat Dinner With Your Family Day 9/26/2011


Today is the day to actually sit everyone down at the dinner table and eat together.  It's Family Day!!!  Kids who eat with their families are more likely not to drink, smoke or use drugs.  This day was started by CASA in 2001.  Choose to sit down together and eat.  Discuss your children's day (or even your significant other's day) and listen.  I never allow any kind of electronic device at the table.  Never.  That is a time for us to focus on each other.  Our best conversations, as a family, happen around the dinner table.  CASA has also put together a dinner kit for you.

Get your kids talking!!!  I am very adamant about knowing that my child can come to me about anything.  I started early at that, because it's harder to get it to that point the older they get.  She honestly trusts me.  She wants to discuss things with me.  She wants to discuss the good AND the bad as soon as she gets off the bus with me.  My step sons are not as vocal, but I didn't raise them. ;)  Need some help with a conversation starter?  Check out these ideas here!

What will you do this evening?  Share your stories with me.  Share your pictures.  Let me know what "funnies" happened around the table.

Enjoy your family.  Feed their bellies.  Feed their souls.


Sunday, September 25, 2011

Pork BUTT!


So, I roasted a pork butt (boston blade roast).  Just made a dry rub, let it sit for a few hours, added a beer and a cup of apple cider vinegar to a roasting pan and then put it in the oven at 475 for 30 minutes, then turned down oven to 275 and roasted for another 5 hours.  Then, I pulled and chopped for sandwiches.


Round Two Recipe!

Headed to a tailgate party and decided to do BBQ Crostinis!!!  I put the pork in the crock pot with BBQ sauce and crushed red pepper and then topped my bread (put in oven for 10 minutes at 375.  EVOO and salt and pepper) with the BBQ pork!


Add a dollop of dill relish and a pepperocini ring.  They went quick (great for football! Men don't think they are eating something so dainty w/ the BBQ on it)!!!


Thursday, September 22, 2011

Had a Headache -- French Onion Soup!


So, I have had on and off headaches for the last few days.  I decided to whip me up some FOS, hoping to feel better.  I used to swear by FOS to cure hangovers.  My headache was not from a hangover, but it kind of felt like one of "those" headaches, so I thought French Onion Soup!  I dunno...anyway...here we go.


Depending on how much you make, this will determine how many onions you need to slice.  I was only making enough for 3 bowls or so, so I sliced one large onion (I did a half yellow and a half purple onion -- just my taste).  If you are doing a large pot, you would need about 3 onions.  They really cook down here, so don't worry about this mound of onion you may have.  Trust me.  And I hope your eyes can handle it. ;)

Melt butter over medium low-medium heat.  Add your onions (I also added 2 stalks of celery, with the leaves), garlic powder, crushed red pepper, salt and pepper, and thyme.  Cover and let the onions get nice and dark.  This will take 30-45 minutes.


Once onions have caramelized and gotten nice and "gummy," add enough beef broth or stock to get the soup the way you like it.  For my pot, I added one box of broth.  Shake a few dashes of your Worcestershire and hot sauce (again, my taste), let it come to a simmer and taste.  Add more salt and pepper to taste.

Meanwhile, my soup bowl is a perfect size to make a hamburger bun crouton.  So, I used the bottom part of a bun and toasted it up in the toaster oven.  You can also just add croutons to your soup.


Place soup in your bowl (leave enough room to add your crouton(s)) and top with your favorite cheese.  Broil the whole thing under a broiler to melt your cheese and get it nice and bubbly and golden.  I like burnt edges...crunchy and yummy.  I also add grated parmesean to the top.  That gets nice and crunchy, too, for a nice texture.


Hope you feel better. :)

Recipe Card (this is for two, double recipe if you need to feed more)

1 large onion, sliced
3 TBSP. unsalted butter
1-2 small stalks celery (dice those leaves up, too!)
1 tsp. garlic powder
1 tsp. crushed red pepper
1 TBSP. fresh thyme (if you are using dried, use 1 tsp.)
1 tsp. kosher salt
1 tsp. black pepper
1 box beef broth or stock
dashes of Worcestershire and hot sauce
crouton
cheese to top (Gruyere works well, I had sliced provolone in the house. I also topped with grated parm)

Round Two Recipe!

Make a french dip!!!!  Roast beef, melted swiss, raw onion, raw horseradish, with a side of your FOS!  Make sure you also have a side of GUM!


Wednesday, September 21, 2011

Weekday Dinner -- Tuna Casserole


Good for those who need a quick dinner, on a budget, etc!  Check out the variations below!  Recipe calls for cream of mushroom soup.  My kids "claim" they do not like mushrooms.  They eat it up and have no idea that it has mushrooms in it.

So, sometimes with kids, dinners are hard to prepare on week days.  There's no time for simmering, long braising processes, etc.  Here's a dish that can easily get you through with the great protein of tuna!  My kids really love this dish.  Hope yours do, too!

Preheat oven to 375 degrees.  Meanwhile, boil a pot of water.  Once it boils, add a significant amount of salt and cook about 3/4 of your bag off thin egg noodles.  Don't cook them to al dente.  You want to stop them about 2 minutes before al dente because they will continue to cook when you put the casserole in the oven.

Drain pasta and add back to your hot pot.  Add your cream of mushroom soup, shredded cheese and your drained tuna.  Add 1 tsp. of kosher salt (if you use regular salt, cut in half) and 1/2 tsp. black pepper.  Stir well and incorporate all ingredients.  Add 1/2 c. milk and stir again.

Grease your casserole dish and add everything to the dish.

Shown before cheese added

Top with as much cheese as you want.  Add to the oven and cook for about 20 minutes, or until the edges are bubbling and your cheese is starting to brown.

Serve with a veggie and bread!  EASY!


Recipe Card
Bag of thin egg noodles (you can use wide, I just prefer the thin or medium)
5 small cans of tuna, IN WATER, and drained
2 cans of cream of mushroom soup
1 1/2 c. shredded cheddar for casserole and more to top the casserole
1/2 c. milk
salt and pepper

***Try topping with buttered panko bread crumbs.  Just make sure you mix them with melted butter first or they will absorb all the fat from the cheese and make the cheese not "so melty."


***Add frozen peas to the mixture to go ahead and get your veggies right in the dish.


***Try with one can of cream of mushroom soup and with one can of cream of celery soup.


Sunday, September 18, 2011

Happy Hour App -- Squash Blossoms and Stuffed Peppers

So, I was at the South of the James Farmer's Market on Saturday.  I was able to pick up some squash blossoms and beautiful purple bell peppers.  Here's my tasty treats I created for a little happy hour appetizers at home!  Check out my visit HERE!


For the peppers...I cut them in half.  See?  They're green inside.  Their skin is really thin, so no need to blanch them before cooking.


Preheat oven to 350.  Meanwhile, saute chorizo sausage, garlic and red onions in a little EVOO until the sausage renders its fat and is slightly browned.  


Add the warm mixture to a box of softened cream cheese (8 oz.) and stir.  Add salt and pepper.  You won't need much salt because the chorizo is salty.  Sprinkle mixture with cayenne pepper.

Stuff your peppers and add to a baking sheet that you have drizzled with oil.


Bake at 350 for about 20 minutes or until your peppers are starting to shrivel up from roasting.  Your cheese should be slightly brown.  Turn your broiler on and broil until the cheese is browned on top.  I garnished with diced tomato.  Easy!!!  My husband ate all of these but the two I ate!


Recipe Card:

Small peppers of your choice
8 oz. cream cheese
Chorizo
Red onion
Garlic
Sprinkle Cayenne Pepper
Salt and pepper
Oil

For the squash blossoms...

First, you must clean your blossoms.  Open the petals and remove each of the stamens.  I push my finger down there and GENTLY use my fingernail to remove the stamen.  Don't just pull it out at the top...it will pull the whole stem through.  Rinse the inside and out GENTLY and dry on a paper towel.  Pat dry them further with another paper towel.

Chop about one sprig of rosemary finely.  Add to Ricotta Cheese with salt and pepper and a drizzle of EVOO.


Preheat oil on stove to 350.  Meanwhile, add your cheese mixture to a ziploc baggie.  Snip the corner off of the bag and use as a piping bag to pipe a small amount to each blossom. Do not over fill!  The amount will change with each flower, as they are different sizes, but I would say 1-2 tsp. of cheese.  Pinch the ends of the petals together.

Make your tempura batter.  Add 1/4 cup white wine and 3/4 cup soda water with a tsp. of salt and 1/2 tsp. pepper to your cup of flour.  Stir well.  Take your blossoms by the stem and dip into batter.  Add to oil.  Keep doing this for each blossom.  Do not overcrowd your pan.  Flip the blossom over to make sure all sides get cooked.  When they come out of the oil, add to a paper towel lined plate and immediately sprinkle with salt.  If you see cheese starting to cook out of the flower, they are done.


Recipe Card:

Squash blossoms
Ricotta cheese (plan on using about a tablespoon for each blossom that you have -- you'll probably have extra)
Rosemary
salt and pepper
EVOO
piping bag (ziploc)
Canola Oil for frying
1 c. flour
1/4 c. white wine
3/4 c. soda water


Saturday, September 17, 2011

South of the James Farmer's Market

So, I headed to the South of the James Farmer's Market off Forest Hill today...here's a few pictures of what I saw!  I didn't want to get up in too may faces and/or booths and make people uncomfortable, so just got a few.  I purchased squash blossoms, baby purple bell peppers and rosemary today.  Look for what I did with those ingredients soon!


Thursday, September 15, 2011

Mise En Place [MEEZ ahn plahs]

So, I am a huge stickler on this one: Mise en Place.  It is the culinary concept, a french word, meaning "everything in place."  I live and will die by this concept.  I prep my whole kitchen and food before cooking.  Try doing this before you even start the first pan.  You will find it goes a lot smoother and things will come out at the same time.  Still use your timing techniques, but Mise en Place will help.

Ok, let's take this another direction...

Do you want to take a cooking class in the Richmond, VA area?  Mise En Place is your answer.  They offer a variety of cooking classes like, Couples Who Cook (a couple's cooking class), Wine Lovers Experience (learn about different wines and food pairings), Elegant Friday Night Dinner (learn seasonal dinners from appetizer to dessert), Soups and Sandwiches (learn how to prepare more than chicken noodle and grilled cheese), and many, many more.  Classes usually run around $60/person and $120/couple for the couples classes.  Yes, you get to prepare the food and then taste your foods!  Check out their schedule here (September sold out.   Book soon for October!): Mise En Place Class Schedule

Want to have a children's birthday party?  They do those!  Get those kids in the kitchen and let them create a meal with their own hands.  Parties include a meal and a dessert, with several different options.  Get the scoop here: Kids in the Kitchen.

Several expert Chefs head this place up and teach you the tricks of the trade.  Men?  Why not get sneaky, go to one of these classes, and then surprise your lady with a fabulous meal at home for her birthday or anniversary?  More so, how about just a great meal after a long week?  Ding, ding, ding!

So, folks, you have a place to go to learn and taste what you learned.  Take the initiative to learn how to prepare fresh, tasty food and GET COOKIN'!


Wednesday, September 14, 2011

Fall Apples? Make Easy Cobbler!

Ok, it is mid-September and what does the start of Autumn mean?  Well, for one, it's APPLES.  Apples are starting to come out and I thought I would share my easy cobbler.  I have been told this dessert is the best cobbler they have had by many-a-soul.  We, as a family, always take the trek to Carter Mountain Orchard every fall to pick apples.  I like to go early to mid-October, though, so we have the best crops to choose from, but apples are going on sale now in the stores and I decided to go ahead and show you my cobbler recipe.


Want to plan your trip to Carter Mountain by which apples are available monthly?  Check out their availability chart here:  What's Ripe When?  (They have wine tasting and bottles of wine available for purchase.  Taste 'em, buy a bottle, and sip mountainside after you pick apples!  Right up my apple alley!)


Don't have the time to prepare fresh fruit cobbler?  No fear!  Grab three cans of your favorite pie filling at the grocery store and use that as the filling.  No biggie and tastes great!!!  Done it many, many times!!!  Just add your pie filling to your buttered dish and follow the directions for the topping below.  Shortcut recipe card is at the bottom, below the first ingredient list.

Ok, peel your apples and slice.  Get your slice sizes as close as you can to each other so they all cook evenly.  Once everything is sliced, add 4 TBSP. of granulated sugar and stir.  Cover bowl and refrigerate for as long as you can.  This will make a nice syrup from the natural sugars in the apples.  I divided mine into two bowls so I could get my hands in there and work them.


This is how I slice.  I cut straight down, around the core, and then slice.  Do it like you normally do.  I just think this is an easy way!


Take a stick and a half of unsalted butter and cut into pea-sized cubes.  Dip knife in hot water throughout process so your knife will slide through the butter more easily.  Add cubes to a bowl and put back in the fridge to chill until the LAST SECOND that you are ready to use them.


Ok, time to go ahead and mix your apple "spice."  Mix together brown sugar, cornstarch, flour, cinnamon, nutmeg, allspice, and salt in a separate bowl.


Sprinkle mixture over the apple slices and stir well to evenly coat all pieces.  Go ahead and just dump them in a well-buttered baking dish.  I use a deep dish.  Even the top out as well as you can.


Ok, take your cake mix and spread about 3/4 of the package over your apple filling.  Mash up any large clumps with your fingers.  Place your cold butter cubes on top of the cake mix, evenly spaced.  Put in a 375 degree oven for about 45 minutes or until the top is golden brown.  Don't worry if small bits lightly burn.  Those are just the tips that didn't have butter and can be easily picked off before serving.  This shows mine after I removed a few small spots.

Serve with vanilla ice cream.  Try it with a caramel sauce, too!

Recipe Card

8 small Granny Smith apples (green apples are the best for this. They stay firmer)...peeled, cored and sliced (if the apples are large, use 4-6)
4 TBSP. white sugar

1.5 sticks unsalted butter

1 1/4 c. light brown sugar
1 TBSP. cornstarch
2 TBSP. flour
2 TBSP. cinnamon
1 tsp. nutmeg
1 tsp. allspice
1.5 tsp. salt

pat of butter to grease dish

1 box of white cake mix (white, white, white...not yellow, white) -- do not make the batter or anything.  Just use the mix.  Place the powder right on top.  Yep!

Vanilla Ice Cream

If you do the shortcut way:
3 cans of your favorite fruit pie filling (apple, peach, cherry, blueberry)
1.5 sticks of unsalted butter, cut into pea-sized cubes and COLD
1 extra pat of butter to grease dish
1 box white cake mix -- do not make the batter or anything.  Just use the mix.  Place the powder right on top.  Yep!


Free Concert by Alan Jackson for Mineral, VA, site of the East Coast Earthquake

Please vote for Mineral, VA (zip code 23117) to receive a free concert performed by Alan Jackson.  They have been rocked by a 5.8 earthquake and several aftershocks after.  The middle and high schools are not even able to be used this whole school year because of damage.  This town needs your support.

Tuesday, September 13, 2011

Turkey, Brie, Apricot Quesadilla

Great lunch!!!  Slice some Brie Cheese...about 1/4 inch (slice when cold and let it sit out at room temperature for as long as you can).  I am using the log brie in this recipe.  It is round, like the tortilla, and the rind is very thin, so it makes it great for melting.


When you are ready, melt 2 TBSP. of butter in a non stick skillet on  medium to medium high heat.  Spread apricot preserves on one side of ONE tortilla.  Very lightly here!  The preserves will melt and you don't want it making your tortillas soft!  It doesn't take much at all.  Place your deli turkey slices on top of the preserves, then add your Brie on top of the turkey.  Top with your naked tortilla.  Lay the preserve side down into your hot pan, on your melted butter.  Let the quesadilla cook and the tortilla get golden brown.  Flip your quesadilla and brown the other side.  If you need more butter, go ahead and add some before you flip.  Be careful when you move or flip your quesadilla.  It will come apart if you are not careful.

Once your quesadilla is browned on both sides, remove from skillet and let it rest for about 3 minutes.  Take a pizza cutter and cut like a pie.  Serve with a nice side salad (shown with olive oil and balsamic dressing -- great with Brie)!


Recipe Card

2 taco-sized flour tortillas
Apricot Preserves
Brie Cheese
Deli Turkey Slices
2-3 TBSP. butter